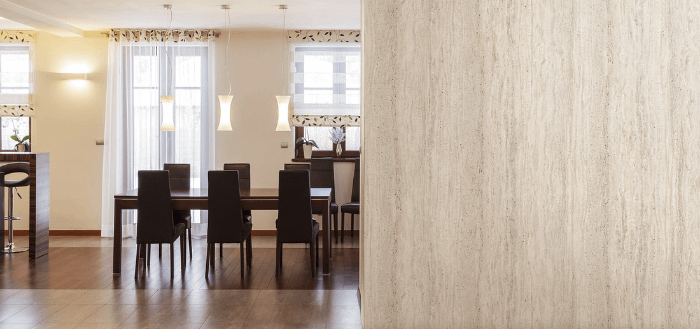
ITA. Nel progetto dell’hotel di cui vi ho parlato tempo fa in questo post ho avuto modo di poter utilizzare un materiale “nuovo” (in realtà l’azienda ha già diversi anni di vita, ma in Thailandia non avevo mai visto questo materiale) come finitura dei mobili, in alternativa dei soliti laminati. Si tratta di una pellicola adesiva di nome BODAQ prodotta da un’azienda coreana, la Hanwha.
ENG. In the hotel’s project that I have describe you in this post I have the opportunity to use a “new” material (i say “new” but in reality the company have several years old but in Thailand I have never seen this material before) as furniture’s finishing, instead of laminate. This material is a interior decorative film called BODAQ produced by a Korean company, the Hanwha.
THAI. เมื่อเราได้ออกแบบบโรงแรม ที่เราได้คุยในโพสต์นี้ เรามีโอกาสใช้วัสดุใหม่แทนลามิเนต ชื่อวัสดุนี้คือ “Bodaq” เป็นฟิล์มของบริษัทเกาหลี Hanwha.
ITA. “Attenzione!: Questo post non è sponsorizzato. Di seguito vi riporto semplicemente la mia esperienza con questo materiale”
ENG. “Warning!: This post is not sponsored. Below I just tell you my experience with this material”
THAI. “คำเตือน !: โพสต์นี้ไม่ได้รับการสนับสนุน ด้านล่างนี้แค่บอกเกี่ยวกับประสบการณ์ที่ได้มาของวัสดุนี้ “

ITA. Questa pellicola adesiva presenta diversi vantaggi tra cui:
- facilità di installazione
- velocità di installazione
- possibilità di installazione su superfici curve
- possibilità di installazione su rientranze, anche piccole come le scanalature decorative dei mobili, in un’unica passata con la parte esterna
- possibilità di coprire grandi superfici senza “giunzioni”
La pellicola infatti è larga 1.20 m e viene venduta in rotoli lunghi 5 metri il cui retro è quadrettato per facilitarne il taglio durante i lavori.
ENG. This adhesive film has several advantages including:
- easy installation
- quick installation
- can be use on curved surfaces
- can be put on grooves in one pass with the furniture’s face
- can cover large surfaces without to much visibles junctions
The film is 1.20 m wide and sold in 5 m long rolls, the back of it is squared to facilitate the cutting during work.
THAI. ฟิล์มนี้มีความดีคือ
- ติดตั้งง่ายๆ
- ติดตั้งได้รวดเร็ว
- สามารถติดตั้งบนพื้นผิวโค้งได้สวยงาม
- สามารถติดฟิล์มเดียวในเซาะร่อง เป็นชิ้นเดียวกับผิวเฟอร์ ไม่เห็นรอยต่อ
- สามารถปิดพื้นที่ใหญ่ได้เรียบ ไม่เห็นรอยต่อ
ฟิล์มนี้กว้าง 1.20 ม. และยาว 5 ม/กล่อง. ด้านหลังของฟิล์มมี pattern สี่เหลี่ยม ที่ช่วยเมื่อต้องตัดตามขนาดที่ต้องการ สามารถตัดกับคัตเตอร์ธรรมดาได้

ITA. Esistono diverse texture, ma la maggior parte del catalogo mostra legni di qualsiasi colore (naturale) e con diverse venature. Ma ci sono anche colori piatti (come il grigio nella prima foto), texture finta pietra, finto mattone e simil stoffa.
Per l’albergo ho scelto un grigio scuro e un legno chiaro sia per la testata del letto sia per il mobile della tv.
L’applicazione della pellicola è semplice: basta dare una passata di primer (inodore) sul mobile in legno che si vuole ricoprire, dopo averlo scartavetrato per bene.
Dopo un’oretta ci si può già mettere all’opera: grazie alla quadrettatura sul retro del rotolo si può facilmente tagliare la pellicola con un taglierino, dopodiché lo si può applicare come si farebbe con uno stickers, togliendo una parte della pellicola sul retro e posando il film sul legno, aiutandosi con una “paletta” di plastica per evitare di creare bolle.
ENG. There are a lot of texture, but if you look at the catalogue you will see a lot of natural colors’ wood’s textures and with different veins. There are also simple colors like the grey one on the first picture, stone, brick and cloth textures.
For the guest’s rooms hotel I choose a dark grey and a bright wood texture for the headbed and the tv furniture.
Put the film is very easy: you need to scraping the wood off, so that you have a flat surface, then just give a hand of primer (odorless) on the wooden furniture you want to cover.
After an hour you can already put it to work: thanks to the squared on the back of the roll, you can easily cut the film with a cutter, then apply it as you would with a stickers, removing a portion of the film on the back, and placing the film on the wood, using a plastic palette to avoid create bubbles.
THAI. Catalogue ของฟิล์มนี้ มีลายให้เลือกเยอะ มีลายสีไม้ธรรมชาติ สีธรรมดา ลายหิน ลายอิฐลายผ้า. ในโรงแรมนี้ เราเลือกสีเทาเข้ม และลายไม้สีออน ใช้ในการตกแต่งหัวเตียงและตู้ TV.
การติดตั้งฟิล์มนี้ไม่ยากเลย แรกๆต้องขัดผิวไม้ให้เรียบ, หลังจากนั้นใช้ไพรเมอร์ที่ใช้ติดฟิล์ม (ไม่มีกลิ่น) ทาบนเฟอร์ที่จะติดฟิล์ม. รอ 1 ชั่วโมงถึงจะติดตั้งได้ ติดเหมือนสติ๊กเกอร์.


ITA. Per quanto riguarda pareti curve, ci si può aiutare con un phon per stickers: facendo scaldare la pellicola è infatti possibile “obbligarla” a seguire le forme del mobile/parete. Di seguito vi mostro alcune foto del rivestimento della mensola del mobile tv, che ha gli angoli arrotondati.
ENG. As for curved walls, you can help yourself with a sticker’s dryer: when heating the film is possible to “force” the film to follow the shapes of the furniture/wall. Below I will show you some photos of the corner of the mobile TV shelf, which has rounded corners.
THAI. ถ้าจะติดบนพื้นผิวโค้ง ต้องมี เครื่องเป่าสติกเกอร์ เพราะเมื่อฟิล์มร้อน สามารถยืดได้


ITA. Quando si vuole rifinire un angolo o si necessita di installare una nuova parte di pellicola adiacente alla pellicola già applicata, l’azienda consiglia di lasciare qualche millimetro su cui si andrà ad applicare la pellicola nuova, per evitare di creare dei “buchi” in cui sia visibile il legno sottostante.
ENG. When you want to refine an angle or need to install a new piece of film adjacent to the film already applied, the company advises you to leave a few millimeters on which you will apply the new film to avoid creating “holes” in which the underlying wood is visible.
THAI. การทำมุมช่างแนะนำให้ติดฟิล์มเพิ่มอีกชิ้น บนฟิล์มเดิม เพื่อจะได้ไม่เห็นไม้ของเฟอร์ที่อยู่ข้างหลัง เหมือนในรูป

ITA. Ho apprezzato molto questo materiale, soprattutto perché permette di ricoprire grandi porzioni di parete o di mobile senza troppi problemi, l’unico limite è dato dalla larghezza del rotolo, che corrisponde a 1.20 m.
Per quanto riguarda il mobile ho risolto il problema inserendo delle scanalature di 5 mm di cui è stato possibile ricoprirne la superficie con la pellicola Bodaq, sopperendo alla necessità di rifinire con i colori l’incavo dopo la stesura della pellicola stessa, fase che invece è necessaria dopo (o prima, a seconda dei falegnami) la posa del laminato.
Per superfici grandi orizzontali, diversi falegnami possono aiutarsi per avere un risultato ottimale, come potete vedere dalla foto seguente in cui il team dell’hotel ha applicato la pellicola sulla testata del letto.
ENG. I really enjoyed this material, especially because it allows to cover large portions of wall or furniture without too much trouble, the only limit is the width of the roll, which is 1.20 m.
As for the furnitures I solved the problem by inserting 5 mm grooves of which it was possible to cover the surface with the Bodaq film, assuming the need to finish with the colors the recess after filming the film, which is instead necessary after (or before, depending on the carpenters) laying the laminate.
For large horizontal surfaces, several carpenters can help to get the best result, as you can see from the following photo where the hotel team applied the film to the head of the bed.
THAI. เราชอบมากวัสดุนี้ เพราะสามารถออกแบบเฟอร์ที่ใหญ่กว่าปกติ และไม่มีปัญหาลอยต่อ แต่ต้องจำไว้ว่าขนาดของฟิล์มเท่ากับ 1.20 ม. ถ้าจะทำเฟอร์ขนาดใหญ่และอยากให้รอยต่อมองไม่เห็น ก็เพิ่มเซาะร่อง จะได้ต่อฟิล์มง่ายขึ้น. ฟิล์มนี้ถ้าช่างมีความชำนาญสามารถติดตั้งคนเดียวได้ แต่ถ้าเป็นชิ้นใหญ่มากก็ต้องใช้ช่างหลายคนช่วยกันติดตั้งจะดีกว่า, เหมือนที่เห็นในรูป ช่างติดตั้งหัวเตียงที่โรงแรม


ITA. Ed ecco il risultato finale dopo che i falegnami hanno finito di posare la pellicola: la stanza di prova è stata terminata in due giorni, con l’aiuto di un falegname dell’azienda Bodaq venuto ad “istruire” il team dell’albergo alle prime armi con questo materiale nuovo anche per loro.
Inutile dire che, paragonato rispetto ai tempi di installazione dei laminati, c’è un notevole risparmio di tempo, senza contare che il lavoro risulta molto pulito e senza “creazione” di polvere.
Per questo motivo viene consigliato di posare la pellicola DOPO aver finito i lavori di posa del pavimento, aver messo gli infissi, ridipinto le pareti, installato le luci ecc.
L’azienda consiglia inoltre di fare una bella pulizia della stanza in cui dovrà avvenire l’installazione per evitare che grumi di polvere vadano a posarsi tra il legno e la pellicola, creando degli antiestetici piccole bolle (essendo la prima volta con questo materiale, ed avendo già preso appuntamento con l’azienda per l’installazione di una camera, l’albergo non ha fatto in tempo a finire per bene la stanza, ma abbiamo provveduto a far pulire per bene la stanza prima dell’installazione).
ENG. And here’s the final result after the carpenters have finished laying the film: the test-room was finished in two days, with the help of a Bodaq’s carpenter who came to “train” the hotel team at first arms with this material.
Needless to say, compared with the times of rolling installation, there is considerable time savings, without the work being very clean and without the “creation” of dust. For this reason, it is recommended to lay the film AFTER finishing the floor laying work, putting the fixtures, repainting the walls, installing the lights, etc.
The company also recommends doing a nice cleaning of the room where installation is to be carried out to prevent dust lumps from laying between the wood and the film, creating unexpected small bubbles (being the first time with this material and having already met with the company for the installation of a room, the hotel did not make it in time to finish the room well, but we did clean the room well before the installation).
THAI. รูปต่อไปเมื่อช่างติดตั้งเสร็จแล้ว. จริงๆบริษัทแนะนำติดตั้งเมื่อทำความสะอาดห้องให้เรียบร้อยก่อน เพราะถ้ามีฝุน อาจจะเข้าระหว่างฟิล์มและไม้เฟอร์ ทำให้พื้นผิวไม่เรียบ ดังนั้นต้องติดตั้งเมื่อห้องกำลังจะเสร็จแล้ว หลังที่ทาสี, ทำพื้นและติดตั้งไฟแล้ว จะดีกว่า. รูปต่อไปคือรูปของห้องตัวอย่างที่ช่างของบริษัท Bodaq ช่วยติดตั้งให้ ช่างโรงแรมดู ถ้าเปรียบเทียบกับงานติดลามิเนต วัสดุนี้จะเร็วกว่า และจะทำให้ไม่มีฝุนหรือเสียงดังเมื่อติดตั้ง


ITA. E voi cosa ne pensate di questo materiale? Lo conoscevate già? Vi sembra interessante come alternativa ai laminati? Se vi va lasciate un commento qui sotto o sulla pagina Facebook!
ENG. And what do you think of this material? Did you know it already? Does it seem interesting to you as an alternative to laminates? If you want to leave a comment here below or on the Facebook page!
THAI. แล้วคุณเคยได้ใช้วัสดุนี้มั๊ย? เคยได้ยิ่นมาก่อน หรือ เคยใช้แค่ลามิเนต?
ถ้าคุณอยากแสดงความคิดเห็น เขียนได้เลย ที่นี่ด้านล่างโพสต์นี้ หรือบนหน้า Facebook เจอกันโพส์ตหน้านะคะ


Lascia un commento